Sunday, October 30, 2016

Maya LT - Good Value or Dead End?

C'mon in and play, what could possibly go wrong?
Earlier this year I took a risk and bought Maya LT, a 3d authoring tool that Autodesk claims is perfectly suited towards indie game developers, especially if you use their game engine (StingRay).

After six months of constant use in production of our next Unity game, we've come to the conclusion that the LT version was a mistake for us. But first-

The LOVE part... It's fast

After years of using & teaching Max & Maya, Maya LT is a breath of fresh air for the core modeling & animation tasks needed in our game.

1) It's nice and fast. Starts fast, runs fast, and is fairly stable (occasional freeze-ups). You can run multiple instances without really taxing your system.

2) Easily design PBS materials, or use & edit Substances which has been great.

3) It's priced smartly to make it accessible to your average indie developer. A 1-year license can be had for $240 US, or monthly for $30.

Using Maya LT, I built custom rig controls for my Mixamo characters, and happily animated away for months. But then some hard realities became apparent.

The HATE part... LT is where your data goes to die

1) It's a tomb - Scenes you create in LT cannot be loaded into full Maya. You are limited to FBX, so forget about migrating your IK rigs or anything else that uses maya-specific data.

This is a significant misstep on Autodesk's part. We're investing heavily to create assets for our game, but fully expect to re-use them again in other games. This means we're locked into LT permanently, or have to make the hard break and rebuild it all again in full Maya if we decide to upgrade.

2) Not Full MEL - Check out the product comparison list that compares LT to Full Maya. See those check marks next to MEL scripting? That would lead you to believe that LT includes full MEL, but in fact it's gimped. For example, MEL in LT does not allow "Fopen", "Fwrite", "FPrint", etc.. In fact they've closed off any way to share or move data outside of LT, including removing the AnimImportExport plugin.

3) Can't integrate with Source Control or External Export Scripts - Yes, the lack of .NET API support is shown on the comparison list. But what serious Indie Developer doesn't use source control? And you cannot run shell commands from the OS. So interfacing with TFS becomes a non-starter, gotta do it old school (wasting time & introducing human error).

There are other annoyances that are typical for a 3d Package. But the above 3 items alone have me seriously considering buying a full Maya license and re-building our assets there so we're not trapped in a diabolically closed, walled garden that would impress Apple engineers.

I understand all the security arguments and why Autodesk built all this firewall code. But honestly, developers write plugins and extend the tools to solve problems in production. Maya LT is a good short-term solution for limited content creation, but falls well short in it's goal of improving indie development.

Saturday, August 20, 2016

Your Curve Editor is a Damn Liar!


Professor Bunsen explains Maya's curve editor to Beaker

This is one of those blog posts I'm writing in the hope that I've foolishly overlooked something obvious. Where some smart person would reply with "Hey n00b just click these 3 checkboxes and bada-bing you're all good".

Where do I start? I'm not an animator, but I need to be one for our current game project. I'm animating characters for a first-person action game we're building in Unity 5.

While a lot of the motion is specific, in many cases the player controller input drives movement, like looking around, and turning the character, etc.. So these actions need to use very high precision linear animations for a lot of different reasons.

In pursuit of trying to get all that movement correct we ran into tangent & curve issues in Maya that caused a fair amount of pain. 

If you animate a character in Max or Maya, you probably use IK and a control rig on some (or all) of the skeleton. When it comes time to export clips to Unity, normally you would bake everything down to the joints, either inside Maya, or upon exporting an FBX file.

And that's where the fun begins.

The first sign of problems cropped up when I needed to do a very short, precise animation that switched between two poses. The animation was three frames, where the first frame is a reference pose, and the next 2 frames are the target pose. 

My first inclination was to set frames 2-3 to Linear Tangents, both in & outgoing. In Maya's curve editor it looked right. But once we had it in Unity it was doing really weird stuff. 

Why? 

To check, we imported the FBX into 3ds Max and saw a big difference. Here is the same FBX file side-by-side in both curve editors:

When Linear is not Linear
Seriously, who is responsible for this?

Really? Yes, this is specifically a problem with how linear tangents are handled (and displayed) after the baking process in Maya. 

Maya was lying. Regardless of what tangent type is selected, once baked your selected tangent type will revert to Auto.

This little gremlin would rear it's ugly head again, when a few days later I had a joint rotation that had a linear curve, but once baked, the first & last keys would reset back to auto tangents! This is what I'm talking about in a simple example:


No idea why this happens. As you may know, there's two ways to bake keys in Maya. When you have an IK control rig, it's nice to use "Bake Simulation" to bake everything down to the joints. Then you can delete all the controls and be left with nice clean joints to export.

Or, you can skip all that, and let the FBX Export bake your animation (not as elegant, you can select the joints and use Export Selected, but it may still include control rig elements). 

Now, you would think that either of those baking options would produce the same curves result, right? Wrong.

In the most aggregious case, I had a turning animation where the character's hips would rotate from 120deg left to 120deg right. We use this as one of the axis of turning for when our character looks around.


The hip joint is rotated off cardinal axes in the character's normal pose (this is a Mixamo rig). If you turn the upper body from left all the way to the right, your hip joint would rotate on world Y (up) axis instead of local. So you would naturally end up with curves on all 3 axes.

What could go wrong? Well, here are the Maya rotation curves on the hip joint from using Bake Simulation vs. just FBX Export (with bake option checked):


When a curve is not a curve
Continuity be DAMNED

Aye Carumba! How could the animation you saw above be represented by those curves? What is that, gimball lock? I have no idea what I"m looking at here.

And that's where things get serious. Is this just bad math in Maya? 

Usually this is where I step back and say "ok, there's no way this could be the software, we must be doing something wrong"... only to arrive back at the same point. So then I thought, what if I did the same animation in 3ds Max, would the curves look the same?

Answer: NO

After a re-building the control rig & setting up constraints in Max, I created the same exact animation of the hip rotation (Note: in Max, there's no way to internally Bake Simulation like in Maya, you can only export FBX to bake). 

Once again we re-import the FBX back into Max and lo & behold, look at the (vastly improved) hip joint rotation curves:


Max saves the day
Order is restored in the galaxy.

So let me make sure I have this straight:

1) Two 3d packages from the same company
2) Both cases using Euler rotation controller on Hip joint
3) 3 different curve/tangent results from the same joint in the same animation

See, this is the kind of thing that will rapidly accelerate the aging process for an old art dude like myself. 

Yeesh.

So now, please tell me I missed something really simple. Or stupid. I would gladly take either at this point. 

(special thanks to my collegues at Digital DNA Games for the endless support and assistance in untangling this hella knot).

#GamedevIsEasy

Tuesday, April 5, 2016

So many mouse clicks...


I really need to blog more about game development stuff, but sometimes you're so deep in the woods that it's kind of overwhelming to break it all down in a way that people could obtain something useful from it.

In the last six months my work has been dealing with Unity 5, here are just a few of things I've been focused on:

- working around the huge grenade Unity threw into lighting... just... FFS ENLIGHTEN!

- accordingly putting real-time, baked, and mixed lighting modes through endless trials in an attempt to get useable results

- creating big terrains (8km) with high density vegetation, road systems, and placed structures

- clothing swaps for characters, and building an efficient rig to support this (ongoing)

- vehicle rigs with character drivers, support for co-op players

Once we get this next game out I will probably spend a few weeks just writing up the process and challenges we've been going through.

Until then let's just say that nothing is easy, any substantial gains are a hard-fought, perpetual process of trial & error. :)

Saturday, October 17, 2015

Notice of Project & Authorship Change


This post is just to officially notify all that as of September 30 2015 my work & involvement with the game project known as Savage Lands Early Access has come to an end. The fine folks at Signal Studios are taking things forward, and I wish them the best of fortunes. It was quite an experience!

What's next? An exciting new project is kicking off and I really look forward to briefing everyone on all the cool details as soon as we're ready to show!

Cheers, -H

Friday, May 29, 2015

What is Collaborative Art Process?

Everyone on the team needs to contribute action.
A good art director in game development should be able to communicate a vision that is compelling, yet realistically attainable in a production sense.

But how the A/D goes about including the whole team in the process, from all disciplines, is the key to a healthy culture. No one should ever pretend to be an absolute authority on everything. That doesn't exist.

Knowing one's limitations, and working with people who complement them gives a project the best chance of success. It should never be about ego, instead always about making the game better.

I have a rule that I set when working on game project:

Anyone who feels something in the game could or should be better is encouraged to offer up a better solution.
But they have to show it, not tell it.

Think the lighting isn't up to par? Great, start up the game tools, build a better rig, and demonstrate why it's better. Assuming it looks better and runs efficiently, why wouldn't we want that?

Of course we would. We all want the game to be better.

In non-territorial development, we should always welcome & encourage this positive energy from competent developers.

But what if a team member's proposal isn't better?

In that situation the person putting forth the effort should be rewarded with a concise, professional explanation that is steeped in art fundamentals & best practices. Not "I didn't like it". That is in no way fair or respectful.

We learn from each other, and we grow stronger. That's the essence of collaborative art process.

But, it can all go wrong is when tell supplants show. Talk is a data point, action offers up real solutions.

Avoid becoming or collaborating with a person who believes that talking about game dev is actually creating something.

These people sometimes closely guard their role and build a fictional narrative about their worth. They may attempt to counter their lack of substance with politics or drama.

These are toxic elements which can fracture a healthy studio culture and mute collaboration.

As an art director or studio manager it's absolutely your responsibility to nip this kind of thing in the bud. Let it fester, and watch your team stop trusting you.

The people you work with are important. 

After you spend enough time in the industry you will seek out collaborative folks who know their stuff and are pleasant & professional to work with.

Nurture this culture, and evangelize it to everyone you work with. Build up a team that collaborates freely and creates the best game possible!

Tuesday, March 17, 2015

Environment in Savage Lands: Part 3 - Vegetation and Chopping Down Trees

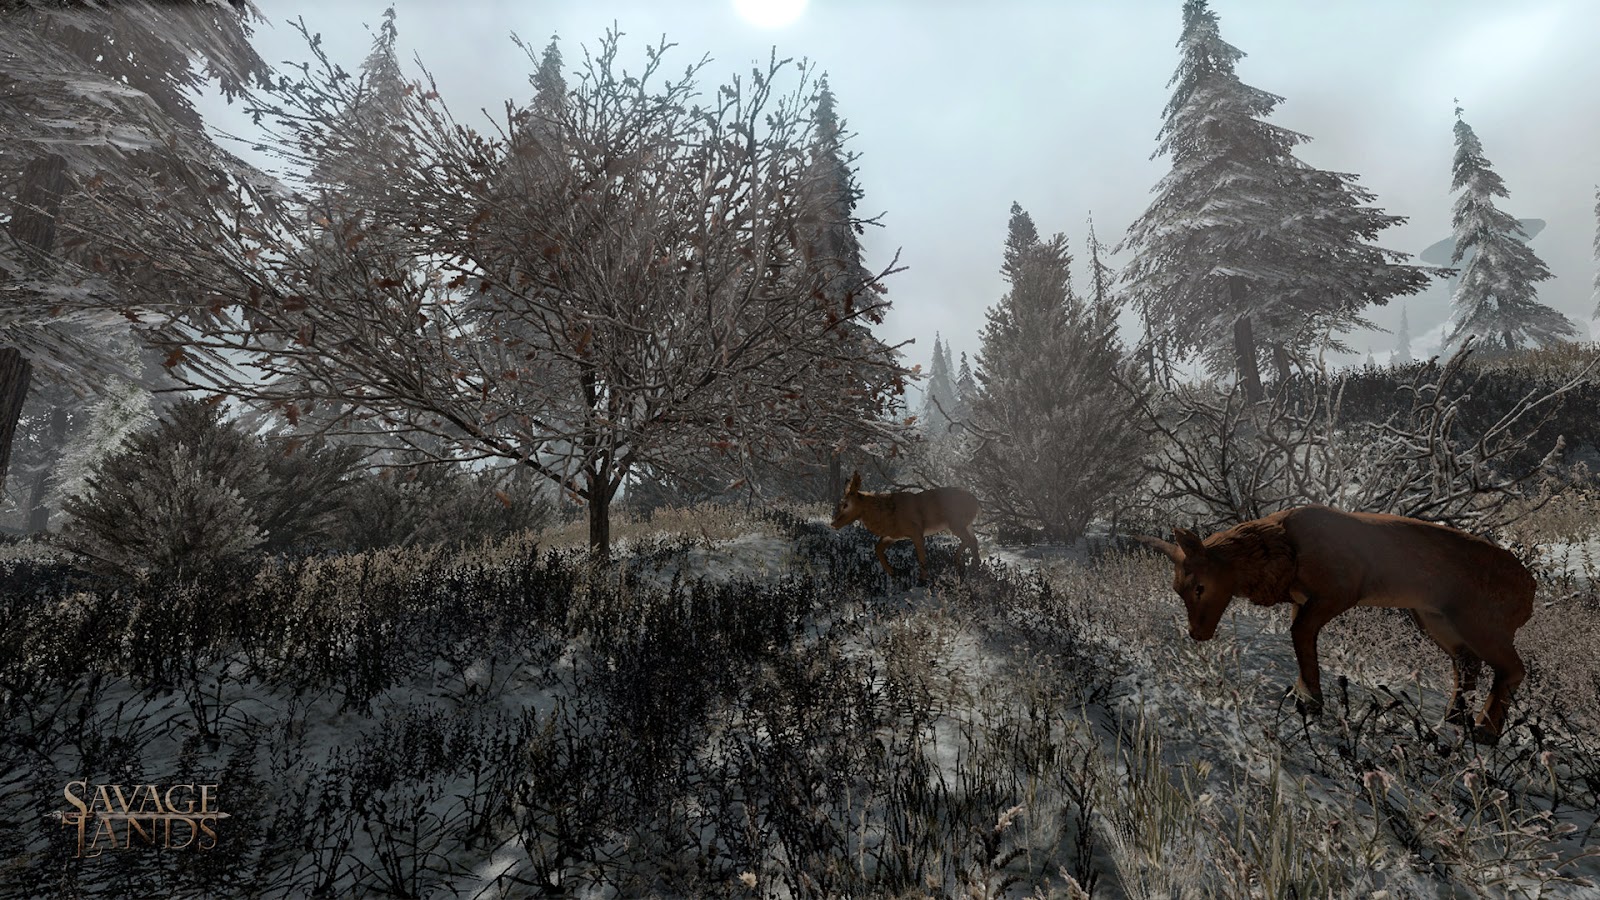
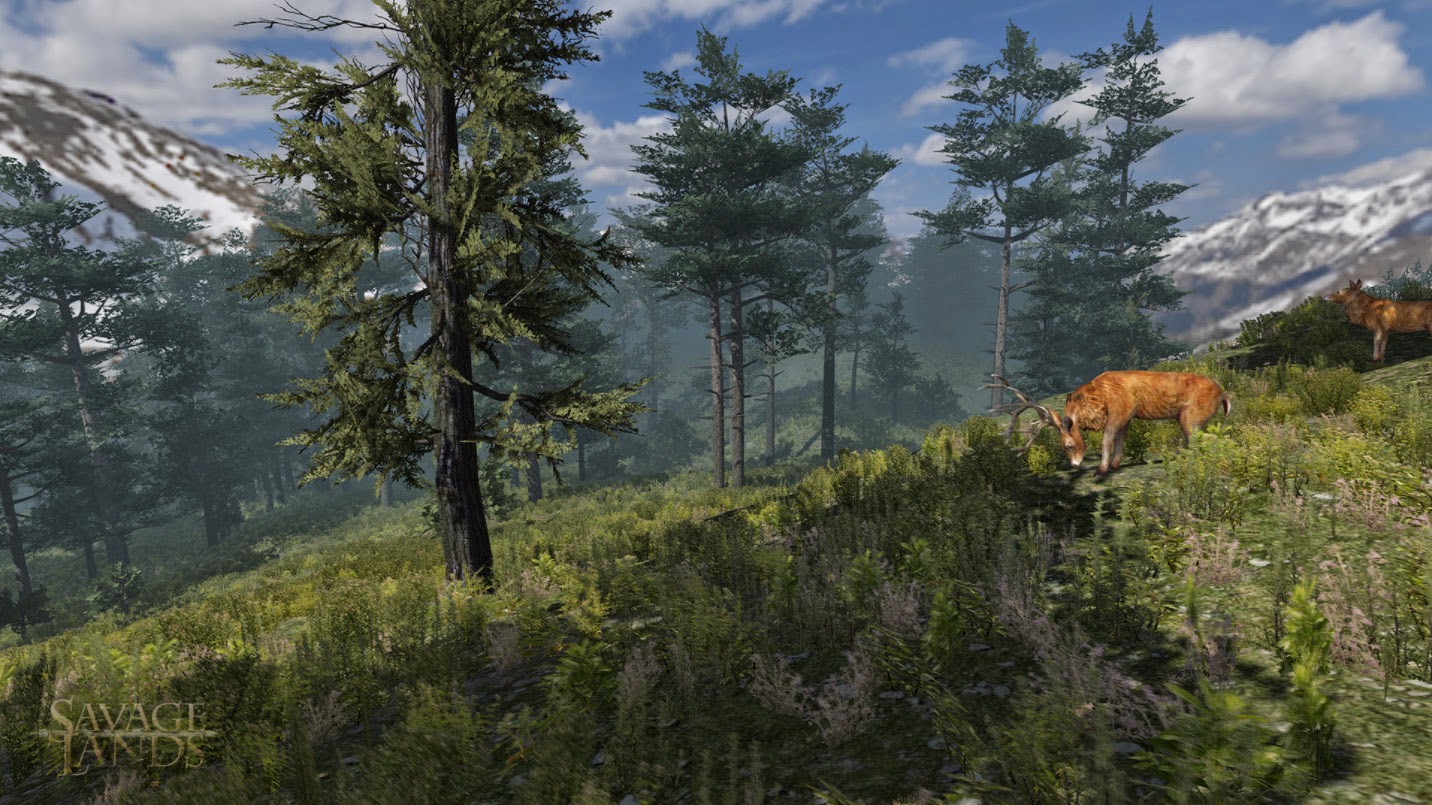
Deer feasting on polygonal sprites in Savage Lands
screenshot from Savage Lands

In the previous post, I went through the process of applying textures to the terrain. Next I will be talking about nature content like trees, grass, & rock. Also, how content was made for the tree & bush destruction in our game.

Finding the Right Look

When I first set out to do an arctic tundra environment, I erred on the side of happy. In the first revisions of the world, I put a lot of green in to break up the snow and create an appealing look. But it wasn't harsh enough, and didn't differentiate us enough from other games.

Here's a screen from a very early prototype of the game:

early test environment
I needed to go with a more hardcore, brutal look instead. Less Canadian Rockies, more desolate Siberia. Time was a major factor, we were hoping to get early alpha versions up & running within a month.

Almost everything we bought from the Unity asset store over the course of the project turned out to be disappointing, whether it was tech or art content. What often looks good in the store window turns out to be less than promised when implemented. But the exception to this rule (besides Terrain Composer) was finding the Winter Pack from Manufactura K4.

They did a fantastic job of bundling together a balanced content assortment of trees, bushes, rocks, and other winter environment elements. Everything is very high quality, aesthetically strong, and completely finished to work in Unity seamlessly. As an indie developer I greatly appreciate the promise of the asset store occasionally coming true, and saving a ton of content development time.

Populating the World

In Terrain Composer there are 3 layers of scattered content for the game:

- Trees (this includes bushes) essentially large plants
- Grasses (polygonal sprites) for small plants
- Rocks (objects) for obstacles & breaking up the player flow

For each layer I needed to create a custom mask to control the distribution of objects throughout the environment. These nature objects need to appear only on the flatter ground areas, and have varying falloff as they get closer to the ocean. The steepness mask is generated in World Machine, then post-processed to accommodate the water line.

Additionally, we need to prevent these objects from appearing on paths, or inside structures and other placed game objects. For this we can generate an Objects Mask in Terrain Composer, a fantastic time saver. The trick here is precisely registering this mask with the World Machine output. For this I created a node in the world at 0,0,0, and parent the game objects to this node so they are all considered in the mask.

Here you can see how this is all used:

Vegetation masks at work
An important note: Having grass displayed in Unity's editor completely kills performance. And by kills, I mean utterly smashes into oblivion. Fortunately Terrain Composer lets you set draw distances for trees & grass separately between the editor & run-time. Setting the grass distance to 0 makes the editor useable again.

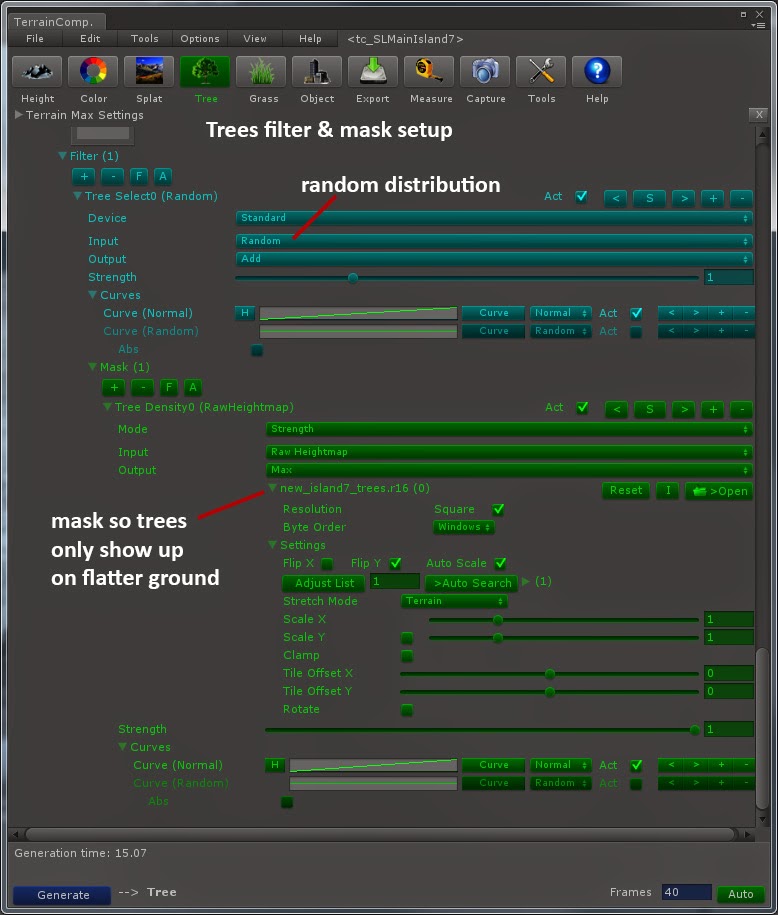
For nature objects, the filters & masks in Terrain Composer work just like what I showed in the previous post on texturing. Here is the set up for the trees:

Tree distribution - filter & mask
Chopping Down Trees

After the world was populated with natural objects, we proceeded to tackle the issue of chopping down trees. This was tricky, first because one of our talented programmers at Digital DNA needed to write a new collision system that would support the huge number of trees on the map. This made it possible work around some classic memory limit issues. A system also was required to remove trees from the world (leaving behind stumps), and making the tree top fall over.

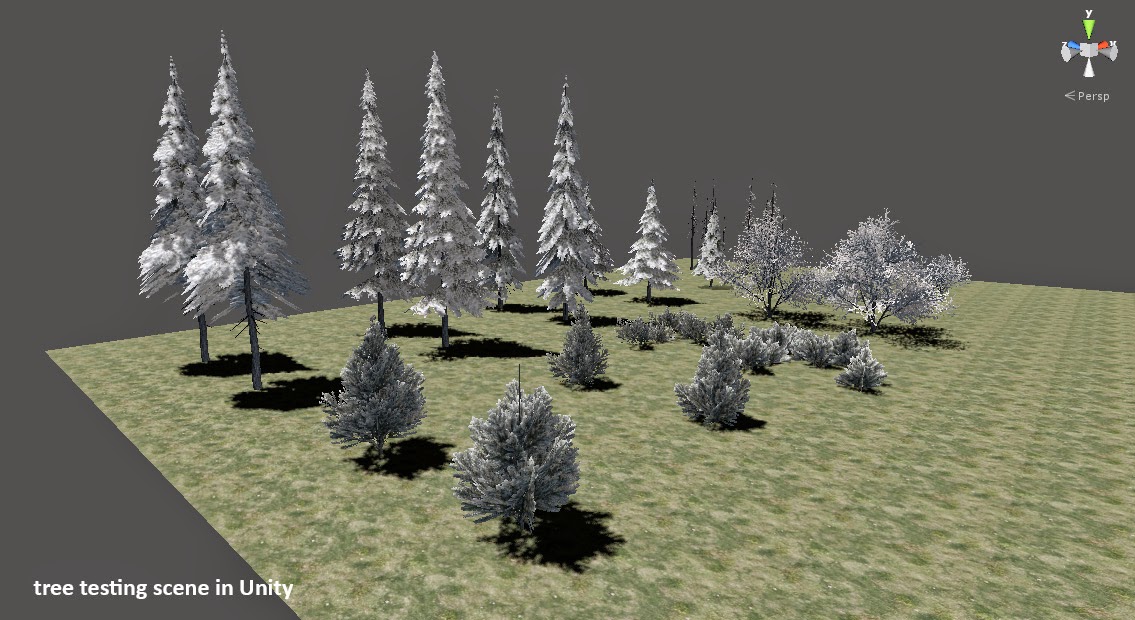
The next challenge was getting the tree prefabs out of Unity 3D and into a 3D editor so I could create the destruction models. The best tool for this turned out the be Export2Maya, a package from Michael Cook available on the Unity asset store. It's a simple and clean interface that exports the geometry & UVs out into OBJ format. Just make sure that in Unity you center the model in the world before hitting export.

Tree testing scene in Unity 3D
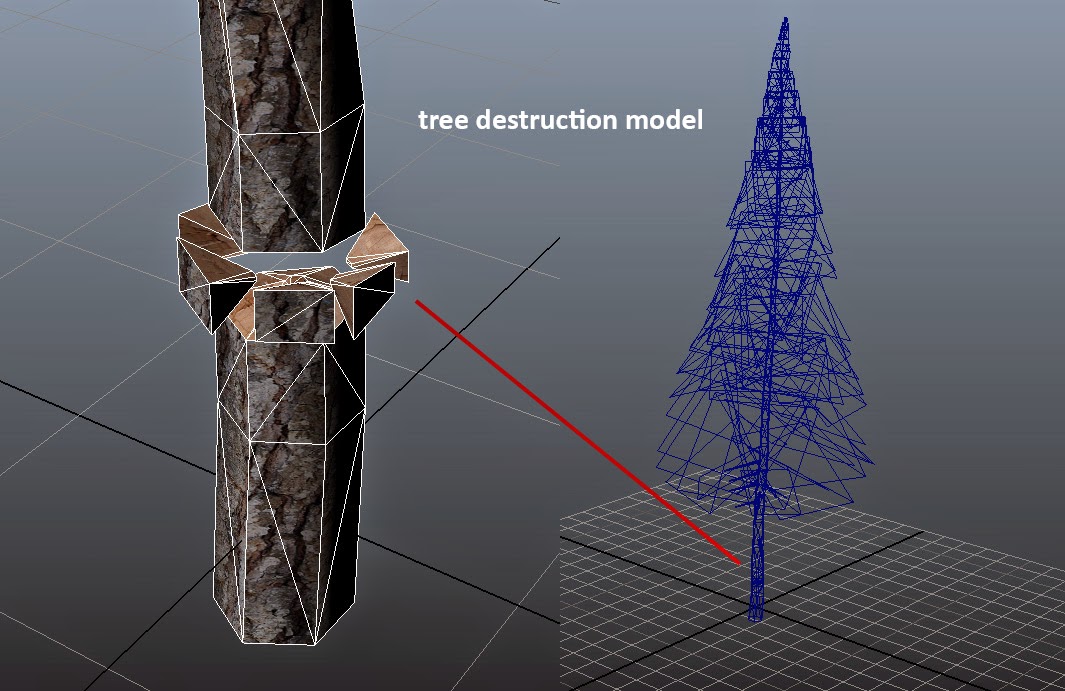
Once I had a tree outside of Unity, I proceeded to cut it up into pieces:

- Trunk
- Chunks (removed while chopping)
- Tree Top (part that falls over)

The hardest part of this was dealing with what happens when you cut apart a model with existing UVs. If the are any un-welded vertices or geometry wierdness, the UV's break and you have to redo them. This ended up being the case on most of the tree trunks. The challenge here is, when the trees are swapped between intact & destructable, you want zero change in appearance that would give away the switch. So new UVs have to perfectly match the original ones.

Also, a texture representing the tree interior needed to be added. Here is an exploded view of the destructable tree:

chop-able tree exploded view
This had to be repeated for every tree & bush in the game, which ended up being a fair amount of work. For the smaller bushes I simplified this setup so that whacking away at it just removes partial chunks until it's gone.

I still have a problem to solve, which is a slight brightness pop when the trees swap states. Terrain Composer is set up to do some random tinting of vegetation, this makes the intact tree appear darker than the destructable tree. People see this as a lighting change, but it's most likely just the tint going away.

Thoughts & Lessons

It's worth mentioning that we apply wind to all the vegetation, but it's nowhere near the look I want yet. The trees sort of "shake & shimmy" instead of showing larger scale motion. And the grasses all move in unison, and could use more variation of motion. Both are issues I'm looking to solve in the near future.

Once again, none of this cool stuff would have seen the light of day without the incredible support & amazing minds at Digital DNA Games.

-H


Monday, March 16, 2015

Environment in Savage Lands: Part 2 - Terrain Composer & Splat Textures in Unity 3D

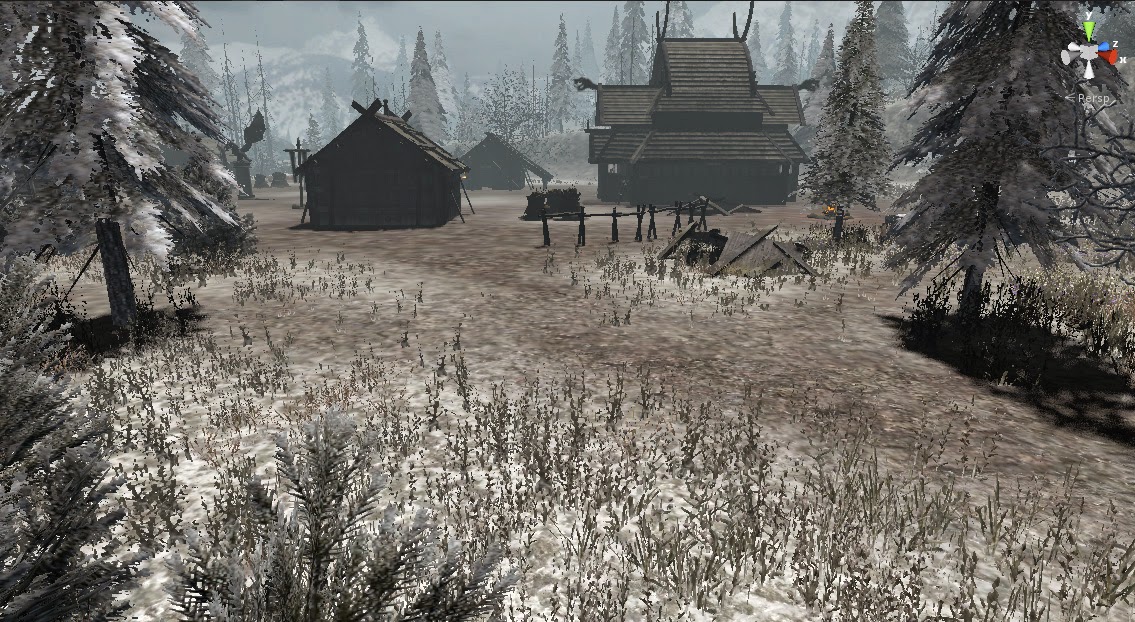
Outside the village Argo
screnshot from Savage Lands

In my last post I talked about the concept phase, and the tools & procedural sculpting of our height map.

Moving to the next step of the pipeline, I will attempt to describe how we established the environment in Unity using Terrain Composer. The first stage is the terrain texture application.

Booting Up

Unity 4 already has built-in terrain & tree systems, but we were looking for a way to really maximize the treatment & organic feel of the environment space. Terrain Composer was recommended by a colleague who showed me it's unified interface that manages a complex application of textures, vegetation, and objects scattered on the terrain.

Actually using TC was quite another thing. The tool is exceptionally deep & powerful, but the majority of it is undocumented. The videos help a little, but don't go into much depth on the specifics of what every control in the interface actually does. And the interface itself isn't the pinnacle of "artist-friendly".

Here is the setup for the displacement of the terrain mesh:

Height Map setup in Terrain Composer

Generating the terrain mesh was straight forward. You apply the height map texture (16-bit) to a new terrain mesh, the adjust scale and resolution. We experimented with multi-mesh (tiled) terrains for a while, but couldn't really see any advantage to that approach, in fact it made the data more complicated to manage. So we settled on one terrain mesh for the whole world.

Base Texturing

So, it took weeks of experimenting to arrive at a point where I felt I could control the output when it came to splat maps, texture blending, and layer controls. Eventually I went back and started with a stripped down scene in unity, and applying a set of test textures that were color coded and labeled with a unique number.

Then, many knobs were twiddled. Over & over again to understand filters, curves, masks, blend ranges, and how all these things interact. This really helped to see what the tool was actually doing.

The result of this research phase was the decision to use 8 texture sets for the terrain, consisting of 5 snow textures distributed by altitude (ranging from muddy snow to grassy snow to pure snow), 2 rock textures on cliffs, and 1 muddy ground texture that goes underneath villages and the water.

In each texture slot you can set the tile amount & offset under Settings. You can input a diffuse and normal texture map for each channel. I found out much later that you can put a Specular texture into the alpha of the diffuse! Never saw that in the documentation, and it made a huge difference.

Main texture index for terrain

Splat Maps

A "splat" map is usually an RBGA image, you store one mask into each channel for a total of 4 masks in a splat. These masks control where each texture channel is applied on the terrain. This is how Unity likes the data. Terrain Composer generates these in the final step.

But the layers are where the real power is. They let you reference a single mask texture for a given feature, and you can use 16-bit textures for this. Here are each of the layer & filter setups for our terrain textures in TC:

Snow Layer Height Curve & Mask
Cliffs with Steepness Curve
Paths with Mask Only

In the above images you can see 3 layers of application:

1) Snow - curve based on height (altitude). A filter is added with a mask to put snow only on flatter areas of the terrain.

2) Cliffs - curve based on slope steepness. The curve represents degrees, so you have to arrange your index or do some crafty curve editing to get the right texture on the right angle.

3) Paths - no curve variation, just straight application with a filter mask that was painted to localize application to village areas.

For the first layer (snow), it's important to note that the "height" curve represents the full range of a height map, so if the highest point in your height map is 0.5 luminance, you need to adjust the curve max point accordingly.

For each layer you specify the index of textures used, and set a "mix rate" which is the overlap area where two textures are blended together. This really helps provide more variation. You can also set sliders for each texture channel to bias it against the curve.

In this image you can see the Snow textures, and how the mud is pushed down to the lowest altitude so it appears only under the water.

Snow layer blending & bias

Go Time

Once you've defined your textures, layers, and filters, you can generate the final splat maps and TC will apply all this to your terrain. After that we apply the global normal map which adds a lot of nice shading detail. It's crucial to bake the normals from the height map using the same overall terrain height you set in Terrain Composer.

Here is a screenshot showing how the filter masks create nice smooth blends between texture areas.


Lessons and Thoughts

Once you decode the Rubik's cube that is Terrain Composer, it becomes a really great way to manage your terrain features across a huge play area. I would love to contribute to a documentation effort that would save others the countless hours I spent arriving at sane baselines for this part of the pipeline.

There are other tools like Relief Terrain Pack (RTP) that add another level of realism to the terrain shaders & textures. We gave it a try early on, but abandoned it because the added complexity made it tough to get predictable results. Like TC, it's a powerful set of tools that require loads of time to really understand. I may revisit it at a later date, as I've seen some people get amazing results with RTP.

Next, time to fill the world with vegetation!

Part 3 - Vegetation and Chopping Down Trees

Thanks for reading!!
-H

Saturday, March 14, 2015

Environment in Savage Lands: Part 1 - Concept & Sculpting

screenshot from Savage Lands

In my last post I talked about a recent project I'm working on called Savage Lands. Following is the first in a series on how the environment was created.

Concept Phase

Back when we started the project, there were several ideas on the table for what our world should look like. What I was hoping to do was differentiate our world from numerous other survival games, and present a harsh unforgiving climate for a grittier survival experience.

It's funny, I've never been a player of medieval games, or watched Game of Thrones. Most every game I've worked on previously was current, near-future, or futuristic in setting. But as I started to research I became very interested in how GoT treated a setting called "The North", blending both brutal realism and mythical elements in the world.

This research produced our "key" image, the reference that would set the tone for the environment.

key inspirational reference image
The North from GoT, a key inspirational reference image

From there, I made a visual style guide for for the World elements. On large studio games I've worked on, we would typically go way deeper and into greater detail with concept drawings, etc.. But this being an indie project and working with experienced artists, I made a 'lite' style document that provided a broad visual overview.

You can download the style guide here: [zipped Word doc 8mb]

That's a key phrase to remember in all of this: Indie Game. Our hope was to have the core of everything up & running in 3 months. That proved to be wildly optimistic, but the essence of the development process was to move as efficiently as possible, and not rat-hole on anything too specific.

We would start with this direction, then shape it and make it our own interpretation.

Scale & Topology

A lot of discussion ensued about the size of the world. This decision is driven by a variety of factors like the number of players, the speed of player movement, and what the balance is between exploration and player constructed content.

But the reality is, you don't get a true sense of scale until you can actually run around on a map and measure commute times through the space. Some early test maps were experimented with, and the general feeling was that we'd need at least 2x2 km and maybe as much as 8x8 km.

Another classic issue is boundaries, and we decided to go with an island to solve a host of potential issues. Players hate invisible walls, and creating a steep terrain wall around the space makes the world look like a bowl. An island would create interesting water/land interaction spaces, and offer variety to the landscape. If players decided to run into the water, they would die quickly of hypothermia.

So at that point I knew I had to build a big honkin' arctic island. In my head I saw a design that transitioned from sea level up eroded slopes, leading to rolling hills on a broad plateau in the higher elevations.

Crafting the Height Map - Tools

I've been building height map terrains since the first days of KPT Bryce, but it's been a while since setting out to create a game world this way. We needed a tool that would allow iterative design, and generate elements like splat maps, normal maps, and other terrain data.

A colleague of mine had been checking out World Machine, a stand-alone package that uses a node-based interface, and offers a good low-level control for sculpting. It also is designed to work well with Unity 3D, the engine we selected for the game.

Another tool called Terrain Composer seemed like a good fit for texturing & vegetation, and works with World Machine. So the environment pipeline became World Machine -> Terrain Composer -> Unity 3D.

Sculpting the Island

It was very important to me to create a natural, realistic terrain that didn't feel contrived or "gamey". Knowing the play area would be vast, I also wanted as much variation as possible in the topology while keeping things procedural.

After a fair amount of experimentation, I started to envision a 'dual-peak' design. If you only have a single peak, players would just make a beeline straight up the hill to find the highest point. Breaking it into two or more peaks would make the island feel bigger.

In the graphic below, you see the node construction and shaping that takes place in this first stage:

First stage shaping of terrain
Defining the initial shape of the terrain

It starts with a blend of 4 radial gradient peaks, smooshed together then limited using a Constant node. Next we need to add natural break-up to the slopes and some terracing. So we start with the always-magical Perlin noise, and feed that to a Terrace node while using a second Perlin node to modulate it.

Here is the node flow for this stage:

Noise, erosion, and terracing
Breaking up the terrain with organic features

After the Terrace node, we add Erosion and Coastal erosion to emulate the natural flow of water down the slopes. Erosion is brutally expensive in World Composer, it can take up to 10 minutes to calculate the final height map even on a fast system. But it is crucial to providing organic feel and effects of gravity on the terrain.

Adding Game Features

Natural feel is great, but you also need to allow for specific game play features in the design of the terrain. Our designer asked for flat areas to place buildings and other content that would make up abandoned villages and ruins sites. This was partially necessary since the structures were not modeled with "skirts" that would let us sink them into uneven ground.

In the above graphic you may have noticed a node called Layout Generator. This lets you draw spline shapes, then essentially boolean them into the height map. It's pretty tricky to make this feel organic, even with some of the tools they provide to soften the transition of the shapes into the landscape.

Here is a look at a sample shape and it's properties:

Layout Generator & Game Features
Carving features into the terrain

You can see in the above image that the shape cuts into the slope, creating a ridge above and a dropoff below. The area has a roughly 50-75m footprint, with a 10m falloff. The spline shape is easily modifiable, and can be locked when design is complete.

This process was repeated for each village & ruins site on the map. The same technique can be used to create other features like roads, troughs, etc..

Ultimately this tool didn't provide enough true flatness to make the structure placement consistent, so some post-processing was needed on the height & normal maps to ensure we were truly flat in these areas.

The exact issue here is whether you place these features before or after the Erosion passes. You want natural erosion to break up the shape, but it's hard to control how much break up actually gets applied by the erosion. If you place the feature after, you get a really inorganic look with a perfect shape cut into an eroded hill.

Output Stage

The final nodes in the graph create the bitmap output for the main height map, global normal, and masks for defining areas like cliffs.

final output from World Machine

The masks are used to limit vegetation, so for example trees & grass don't appear on really steep slopes. They are also used to specify where certain texture maps are applied, ie. steep slopes get rock, flat get snow, etc..

It's important to note that these bitmaps are the starting point for a lot of downstream work. I create many additional masks for things like meadows and clearings, as well as accommodating game objects like large rocks and structures. For example, you don't want grass growing inside houses.

I will go into more detail on masks and splat maps in the next post.

Lessons & Thoughts

It took a lot of iteration to decide just how tall the island is. In the examples shown above, the terrain is MUCH steeper and more vertical than we ultimately settled on.

I like extreme terrain, but early on it became clear that people didn't enjoy running around on 45-degree slopes. It left many people disoriented, and pushed them to keep moving until finding flatter ground. This is an interesting psychological phenomenon, but it also makes a lot of sense for things like situational awareness.

None of my work would have seen the light of day without the outstanding support of my colleagues at Digital DNA Games, an exceptional group of experienced game developers.

Next up, how we displace & texture the terrain:

Part 2 - Terrain Composer & Splat Textures in Unity 3D

Cheers, -H

Thursday, March 12, 2015

Update: Blood is Still Circulating

So one day you wake up and realize you haven't touched your blog for six months.

Life happens. Since my last post I joined the art faculty at DePaul School of Cinematic Arts. After a few years of adjunct teaching I really was enjoying myself, and when the opportunity came along I applied for it. I was honored when they decided to extend an offer.

At that time I was also well into my next indie game project called Savage Lands. It has since been released to Steam Early Access on March 5. The game is a collaboration between two great indie game studios, Digital DNA and Signal Studios.

My part has been creating the environment, lighting , and special effects. In addition, I created the visual branding for the game. I've been working closely with the talented artists at Signal, who created the characters, creatures, weapons, structures, and user interface.

Here is the trailer I cut together over the holiday break:


In the next several days I will be posting a series of articles describing the environment creation process in Savage Lands. My plan is to take you through the entire sequence from designing the height map, to final polish details.

It's been an amazing education in Unity 3D, procedural art creation, and medieval fantasy genre. All areas I had not spent significant time with before.

On to Part 1 - Concept & Sculpting!

Wednesday, September 17, 2014

Key game studio success ingredient: Positive Energy

Game development work is inherently creative, yet often we don't work in environments conducive to creativity. In many game studios, over-scheduled employees are under immense pressure to meet deadlines with the expectation of hitting ever-increasing quality & experience targets.

In a lecture at the World Creativity forum, John Cleese talked about Closed Mode (getting things done) vs. Open Mode (being creative). “If you’re racing around all day, ticking things off a list, looking at your watch, making phone calls and generally just keeping all the balls in the air, you are not going to have any creative ideas.”

So how do we create the conditions for creativity in such a predominantly Closed Mode (and sometimes toxic) environment? The key is to give & receive positive energy at every opportunity.

Acknowledge and support the work of your peers


It's demoralizing to work hard creating something for your game, announcing it to your team, and being rewarded with silence. Yes, we're all busy with our own work. And yes, all those check-in mails take a little time to read. But that is exactly the time you should be giving energy back to the person who put it in. Even if it's as simple as "Wow, nice!".

The fact is that most creatives thrive on feedback, it's what motivates & drives them to repeat the creation cycle over and over. In a feedback vacuum, the light bulb of energy dims.

It's also a symbol of professional respect, the fabric of strong development teams. That bit of code that makes something cooler or appear more magical, that tweak to the design making the weapon more fun to use, or that lighting pass helping to make a space feel incredibly real... we absolutely should never take these things for granted.

Don't participate in the negative sub-culture


Not all company cultures are healthy. You may find yourself on a team where a sub-group of people continuously grouse amongst themselves about the game, decision making, or how things are being done. Or you may witness people who routinely rip on other games, ignorant of the actual conditions & constraints that those dev teams operated under.

Avoid getting caught in this undertow, there are no positive outcomes possible from these types of interactions. Channel concerns or doubts about your project into positive actions. Seek out the decision makers and politely ask for more clarity or information. Offer them alternatives or at least your help in improving the situation whenever possible.

Accept that no project ever goes perfectly, mistakes can and will be made. Identifying problems is easy, but offering solutions shows you are focused on moving things forward. Put your energy into building your team up vs. tearing them down.

Set an example that makes others eager to follow


John Cleese also said, "Creativity is not a talent, it is a way of operating." Bring positive attitude and humor into all of your interactions, even in "serious" or stressful situations where solemnity and darkness are normally present. Make it apparent to everyone that you protect your creative process in the face of anyone who questions or attempts to devalue it.

Associate yourself with like-minded people, and take time & space outside the grind to explore and bounce fun ideas off each other. Build up this network with the goal of creating a positive sub-culture. Like a Katamari ball, more people will be drawn in who are relieved and eager to participate.

When you see a normally positive colleague who is being overwhelmed by negative forces, or slipping into a depressive spiral, take them out to lunch and offer your help and support. Let them know you care instead of hoping from a distance that the problem will go away.


Yes, all of this is easier said than done. Game development is hard. Some projects can go on for years, and can lead to a loss of perspective as things get ever more off-kilter. Sometimes the only solution to a terminally negative workplace is leaving it.

But the people in the industry I admire the most, the ones who survive the longest with their sanity intact, are the ones who develop the discipline to eschew negativity, and promote positive energy in every aspect of their work.

Tuesday, April 29, 2014

Philosophy of Teaching Game Art

Students playing "Undertakers" at Columbia College's Manifest 2013

For the last two years I've worked in Chicago as an adjunct professor, teaching college students various aspects of game art production. Recently I was asked to write up my teaching philosophy, and since it's actually an art process I felt it appropriate to post here.

My teaching philosophy is rooted in the practical realities of working in the games industry for over two decades. Throughout the process of making games, interviewing and hiring hundreds of artists, building art teams, and surviving the churn & rapid change in the industry, I've developed what I would call a realist philosophy.

For those art students seeking to work for a major game developer or publisher, competition for jobs is at an all-time high. Only the most dedicated individuals with rich portfolios demonstrating a balance between strong art fundamentals and advanced technical skills are being considered by the top studios.

If students wish to pursue the rapidly growing sector of Indie game development, here again only the most creative, prolific, and differentiated individuals will find it possible to sustain a career.

It is for these reasons that I see my goal as closing the gap between expectations and the reality of what students can expect after they graduate. Learning needs to be role-focused, so the skills obtained directly relate to work they will do as professionals. Following is a list of the techniques I apply toward these goals.

1)      Integrate art fundamentals at every step of technical instruction – Creating art in a software package is different from creating a visual aesthetic. Without a solid grounding in visual theory (contrast & affinity, space, line & shape, tone, color, etc.) many students do not attain the ability to precisely control their work to achieve a specific outcome. These skills need to be reinforced and applied at every stage of their work.

2)      Create a culture of feedback & critique – This is done both in the instructor/student level as well as the classroom community. Critique helps students prepare for professional environments where taking direction is required function of the job. Helping students detach ego from their work is part of this, and will result in a stronger portfolio and the knowledge of how to critique others in a positive manner.

3)      Provide a platform for experiential learning – There is undoubtedly a large amount of information that must be imparted to students learning technical skills. To this end lecture is often unavoidable. However wherever possible I believe it’s better for students to gain experience in the process of setting their own goals within time constraints, delivering results, and allowing them to repeat this loop as often as possible. Quite simply this is what they’ll be doing continually in their professional lives.

4)      Focus on building a robust portfolio – Whenever practical, every visual project undertaken in a class should produce portfolio-worthy work. I try to let students make the work uniquely theirs to elevate their attachment & investment. In a four year program, students ideally should finish with dozens of diverse & compelling work examples, curated from hundreds of attempted pieces. I impress this metric on every student I meet.

5)      Teach the importance of building community – Nearly equal to visual & technical skills is the ability to effectively communicate and work in a cross-discipline team setting. The best artists in the world still need to collaborate and interact to be successful, both in local and the global communities. I relate my experiences (both successes and mistakes), show students what professional branding is, and demonstrate why building strong industry connections is crucial to their future.


The professional games industry is an exceptionally challenging, often difficult place to establish and maintain a career. Statistics have shown that the average length of a game developer’s career is around 5-7 years before they burn out.

My goal is to give students the tools, resources, and skills they need to avoid the pitfalls, and give them the foresight to know what’s ahead so they can be successful & happy professionals. I believe the return on their educational investment is of paramount importance.

Sunday, December 22, 2013

You can't go home again (reflections on a virtual past).


A few days ago I logged into the Space MMO Eve Online for the first time in 3 years.

Some background: For about six years I was a pretty hardcore player of EVE online. It's the only MMO I've ever played, mostly because I love sci-fi, and don't center my gaming life around Tolkien-derived worlds. EVE grew to become a great gaming escape at a time where I was burned out on the industry. It helped me learn to love gaming again.

At the peak, I was the CEO of a fairly notorious PVP corporation called Mad Bombers (11B), founded by my good friend Eagleknight11B. At the core, we were just a bunch of guys who liked to drink beer and blow up spaceships late at night. But given how brutal and unforgiving EVE is, we really bonded and built a small and trusted group of friends.

For years we formed wolf packs and roamed in 0.0 security space, terrorizing sleepy, horrible alliances by taking up residence their systems. The best thing about it all was that when we got into a fight, we worked so well together that we could take on gangs much larger than our own and still come out on top. All of this was coordinated using Teamspeak so we could talk to each other.

Eventually things started to fragment, as we had grown so large that the original culture we'd established got diluted and compromised. As in the real world, group dynamics sometimes seem easy to build, but hard to maintain over the long term. In 2010 I resigned my CEO post and left the game to clear my head of all the noise.

This past week I started to think about EVE, and how the best times in the game were around the holidays because everyone was around. So I decided to log back in and see what had changed since I left.

At first, the usual OH GOD WHAT HAVE THEY DONE WITH MY SHIPS? Months of rebalancing, nerfs, and buffs by CCP meant half my spaceships were broken and needed to be reconfigured. A couple of ships I really loved like the Sleipnir and Ishtar were overly nerfed which made me sad.

But then what was really, really weird was the silence.

My contact list of 100's of friends showed nobody on-line. The community I knew and was a part of had all gone. Over the next few days... still no green lights on my list.

I looked through a dozen comm channels, they were always buzzing in the old days. All of them, dead.

Here I was sitting on billions in assets, multiple characters, and years of experience. And I was totally alone, like it had never happened. What a weird sense of loss, one that I've never experienced with any other game in any context. 

Most of the games I've worked on live for a year or so in the market, then fall off into oblivion as the next game comes out. It must be amazing to work on one game for over 10 years just making it better & better all the time. Especially a game that builds long term communities and the memories associated with them.

What does all this have to do with art process? It is my firm belief that to know games, you have to play them as a gamer (not a developer). To understand what game art means to the player, how they value it, and what works in context of the game play. If you don't play the art, I think you can lose some perspective on the process of making it.

Here's whats left of my EVE history, neatly summarized in statistics:

Tryptic Photon
http://eve.battleclinic.com/killboard/combat_record.php?type=player&name=Tryptic+Photon

Thursday, December 19, 2013

Audio is the 'multi' in multimedia.

Today I posted a new Soundcloud page, it contains a mixture of game soundtrack work, rock instrumentals, and various sonic experiments. This is the type of work I do when I need a change of scenery. 

https://soundcloud.com/caustic-photon

Hope you like it!

Wednesday, November 20, 2013

The eagle has landed...

I've finally updated my portfolio with recent work from indie games and other stuff. If you get a chance please have a look, and let me know what you think.

http://www.causticphoton.com

Thanks!

Wednesday, October 16, 2013

Creating an Effective Video Trailer for an Action Game


Greetings,
My last post probably came off a little bit walden-pond-hippie for some, this time I'll be staying more in the physical realm. :)
Several weeks ago my friends at DigitalDNA Games needed a video trailer for CastleminerZ, an FPS/Survival game set in a block-based world. Having done many trailers, I offered to help them out. The game was officially "greenlit" by Steam today, congrats guys!
Let's take a quick inventory of the tools:
  •   Adobe Premiere - Video Editing
  •   Adobe Photoshop - Stills & Masks
  •   Autodesk 3ds Max - Animated titles
  •   Adobe Media Encoder - Final Compression & h.264 output

For moving titles (text), Adobe After Effects obviously works great too. I just find it's easier to me to get what I want from Max, mostly because I've been using the software for like 25 years.
For this project I decided on HDVI 720p 29.97fps as the working resolution. 1080p is awesome, but it's a diminishing margin on return given the additional strain on your system during editing and time in compression stage.
A dual-monitor setup is essential for editing in Premiere; I put most secondary palettes on the 2nd monitor, reserving the maximum amount of space on the 1st monitor for the timeline.
Dual Monitor Layout in Adobe Premiere
Dual-monitor Layout in Adobe Premiere

Getting Started: What's the Structure?
From a visual design perspective, we're creating a fairly standard action trailer that combines captured clips of game play with messaging that communicates the intended experience to the player.
But for me it's not enough to throw a bunch of random game clips together and call it a day. I think good trailers have a visual progression and cadence that keeps the viewer interested through the entire video. This is where you put on your marketing hat, and ask yourself what emotional beats or features will resonate with your target audience.
After playing a fair amount of CastleminerZ, I felt like the core of the game was about survival, adapting to the harsh conditions of the world, and exploring the rich resources that lie beyond the starting zone. 
So the meat of the structure becomes 3 sections; Survive, Adapt, and Explore.
The target length of the video should be around a minute or less. Through experience I've found this is about the average attention span before things feel redundant. You want to tell enough of a story to get people interested, without over-saturating or repeating the messages.

Game Capture: Makes or Breaks Your Video
It really can't be stressed enough... spend sufficient time on getting good, high-quality, high framerate video capture of your game being played. 
Sometimes people rush this step, and end up in an editing session running out of compelling clips, or not having enough variety to make the video interesting. Always better to have too much, vs. too little.
Fortunately the folks at Digital DNA have a high quality capture system, so they scheduled a multiplayer session and we captured well over an hour of video clips. 
Directing a capture session can be easy or hard depending on the game. In our case it involved playing as many of the world areas (biomes) as possible, different times of day, combat with all possible enemies, etc. to create the desired variety.
If you’re doing capture for a game that hasn’t been released yet, you can run into issues. Like the game isn’t fully polished yet, or performance & frame rate are subpar. This adds a level of difficulty to the capture process, and may require you to be selective about what you show. I've been in that situation many times, but this time we were in really good shape.
A fly-cam in your game engine is an invaluable asset for you to capture cinematic shots. These shots add world context, and help make the game appear more epic.
Try to keep your raw capture clips short. For example a 2-hour clip is a massive file, and very cumbersome to work with. Consider shorter captures (10-15 minutes or less), so you can easily label & index them. 
Raw Capture Clips Are Ready to Go!

Culling Out the Best Clips: Grab a Cup of Jo and Get Comfy
Finding the best clips to use for your video is the most time consuming part of this whole process. 90+% of your capture footage is worthless, you need to watch ALL the capture footage carefully to find those brief gold moments of glory.
The way I do this is to drag the raw capture clip into Premiere’s timeline, hit PLAY and start watching. As soon as I see something cool, I cut it out using the razor tool, and put it off to the side. I leave a little leader on either end of the clip for context, and know that I will ultimately trim it down to the core moment.
Then, resume playback of the capture footage. Once you’ve done this for each capture clip, you should have a large number of extracted clips ready to assemble into your edit. 
Culling Out The Good Stuff

Titles: KISS Principle Applies
I usually don’t like wordy action videos, and really try to boil messaging down to the most succinct form. Then, I need to apply a treatment so they visually pop. A subtle approach is to use motion, movie-trailer style, to make your text slowly scale, and appear to moving closer or farther from the viewer.
But for this video I wanted more zazz. I came up with an X-files inspired treatment showing a bright light blasting through cut-out text. This kind of thing has been done a million times, but it’s usually effective if done right.
And while I originally gave the effect a blue color, I later decided that since this was a “greenlight” trailer the text should be green (ha!). It also just fit better with the game footage from a color scheme standpoint. An easy hue adjustment in Premiere does the trick.
In 3ds Max, I chose my font, and created text splines. Then, I extruded them into a 3d model. I kept all my modifier stacks intact so I could easily go back and change text, font, etc. as needed. A large tesselated wall was modeled, and the text model was used as a boolean operator to cut the shapes through the wall.
A target spotlight was placed behind the wall, this is the basis for the “rays” that spray through the cut-out text holes. The actual "foggy rays" effect comes from adding a volumetric effect to the light. Then you can set the light & fog colors, and use light attenuation to limit the length of the rays. 

A lens flare effect was also added to the light to create the bright white core. This is often a lot faster/cheaper than making a true volumetric light core, and you get nice secondaries from it as a bonus.
Creating a Volumetric Light Effect in 3ds Max
For the motion, the light was set up to move from left to right, from one edge of the word to the other.  This gives a nice crossing effect, as the rays offset the light direction. Lastly I add a camera directly facing the wall to center the text in frame. Trucking the camera slowly towards the wall adds another element of motion. 

The clip length was set to two seconds to accomodate fades, but later sped up in Premiere to fit the edit pacing. 
These text treatments were rendered out from 3ds Max to video clips for use in Premiere. Here is the raw output from 3ds Max, Blogger will brutalize the compression on this, so please ignore the artifacts:


Assembling Your Edit: The Really Fun Part
Ok, finally I have all this great game capture, titles & logos. For the most part, the laborious work is over. Let’s revisit our video structure and break it down a little more:
1 – Company logo
2 – Setup Clips (co-op crew forming up & heading out)
3 – First Title (Survive)
4 – Action Clips part A (players getting swarmed by threats, mad combat)
5 - Second Title (Adapt)
6 – Action Clips part B (players adapting to a variety of threats)
7 – Third Title (Explore)
8 – Action Clips part C (variety of scenic vistas and activities)
9 – Game Logo Fly-in
10 – Game URL
I comp’d my logo treatments together in Premiere, using the built-in effects to add some uniqueness.
Laying out all the clips Premiere’s timeline, I use A & B tracks so I can keep things more organized visually, and cross-fade between clips if necessary. I mostly like hard cuts on the action clips, but with titles I like to see them flow into the appropriate section to keep them visually connected. A quick fade-to-black often helps to separate the end of one section and the beginning of the next.
The Final Edit in Adobe Premiere's Timeline Window

Tightening Things Up: Remove the Cruft!
Once an initial edit is assembled, I do a lot of previewing to get a sense of the pace and cadence. Often I'm well over on time at this point, there’s usually just too much fat. 
So I do a pass where I tighten up all the clips to their shortest possible length while not losing key visuals. I also brutally scrutinize each clip and remove those that don’t hit on all cylinders (unless I’m really short on material).
Synchronizing to music is key to building a fun cadence. I will slide the start points of clips slightly to hit on the music beats wherever possible. This adds a lot of subtle impact. In this case I had a wonderful piece of orchestral licensed music that helped frame the game in an epic way. The most important parts of the music are the beginning and ending, these are like the bookends of your story.
I try to keep the sound effects from the game clips as they add to the richness of the audio mix, and help keep you from feeling detached from the game. Remember to turn off game music though! It obviously conflicts with your video soundtrack. A little tweaking in the audio mixer will help set relative levels.
When I have a tight edit I like, I take a break. Walk away from the edit and do something else for a while. I do this because at this point I’ve become emotionally attached to my work, and may be overlooking problems or things that aren’t quite working. Some time away helps reset my perception so when I come back with fresh eyes it’s easier to identify and fix those little things.
Now I can send an edit to the developer for their feedback and (hopefully) approval.

Time To Export: Woohoo!
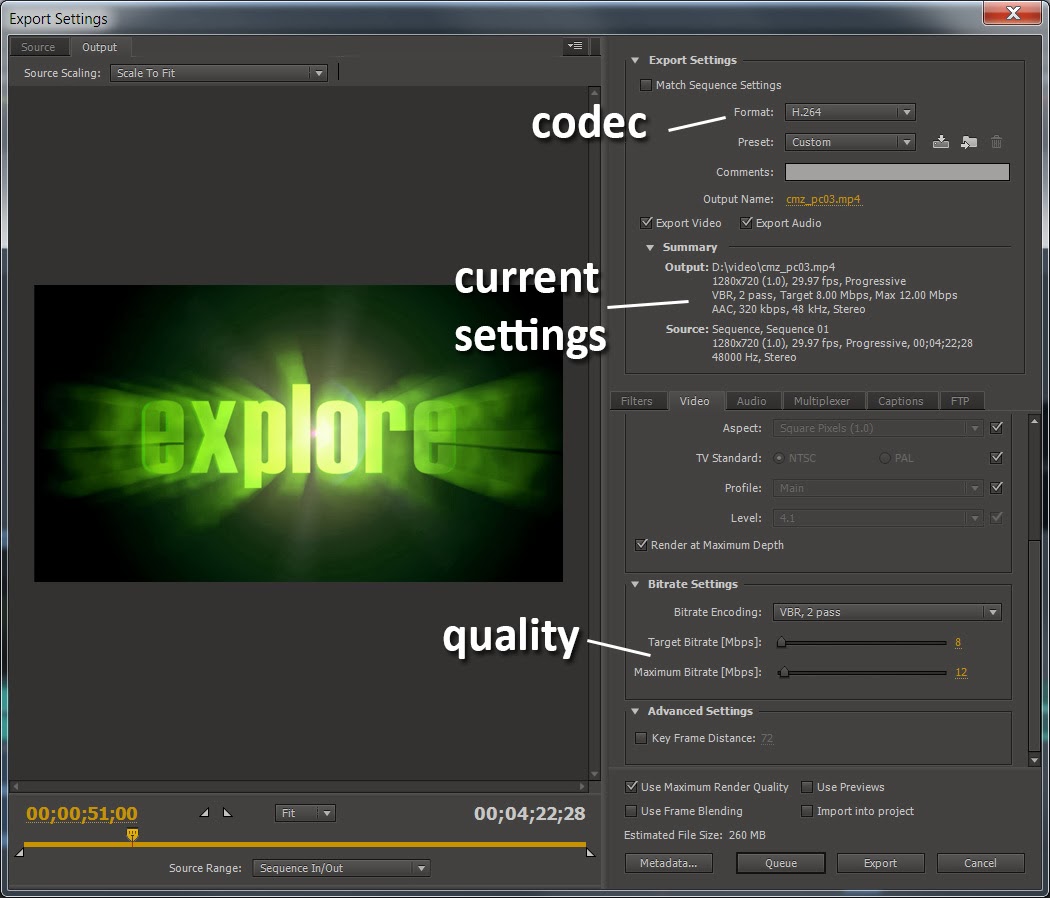
The final step is to use Adobe Media Encoder (now just “File/Export/Media” in Premiere) to compress the final product. If this is going up to Youtube, I render out fairly high quality since Youtube will re-compress the video anyway for different stream types. Going into that process with a lower quality video will result in too many unpleasant artifacts.
Typically I choose h.264 compression for video, and AAC for audio. These seem to be the most widely acceptable, and frankly few other codecs come close in terms of performance vs. quality.
Here’s a shot from AME showing my settings on this video:
  Final Output Settings for Video Compression
Final Output Settings for Video Compression

Final Output
Below is a link to the finished product. The overall project took about 8 hours to complete (not including capture). I would embed the video, but it won't show up on Blogger's youtube search (which is particularly brain dead, and it won't accept a direct URL!):
That’s it! Hope this was informative or useful for some folks. Naturally there's a ton more I could have done to sweeten this, but overall I think it was pretty clean and effective, and helped drive interest to the game.